


Welded mesh gabion cladding in garden
The Global Leader in Gabion Baskets & Gabion Wall
Please tell us
EnZar®
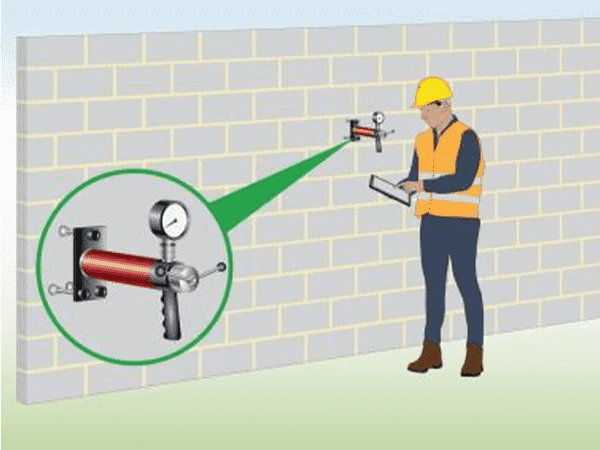
Step 1: Assess the Strength of the Structure
Assess the structure where you are intending to attach the cladding to ensure it can hold the weight of the gabion cladding structure.
If you are not certain, test the structure using a tension testing tool.
Step 2: Mark Area
Mark the exact location where you plan to install the welded mesh gabion cladding. Use a spirit level or laser level to ensure the wall is straight.

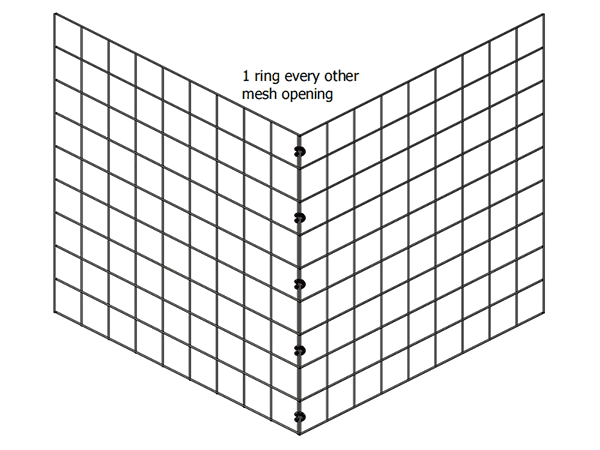
Step 3: Assemble Welded Gabion
If the filled stones are heavy, place the C rings at each mesh. And if the stones are light weight, place them every other meshes.
The C rings are closed with manual or automatic closing tool. It is ideal for large scheme or large projects for long term and efficient use. We can supply this tool along with your goods, just remind us if you need it.
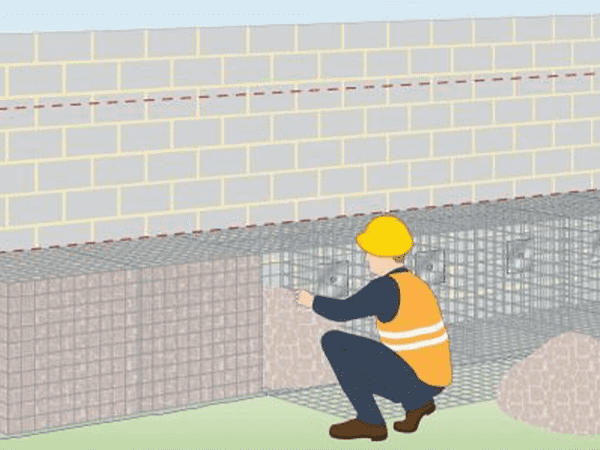
Step 4: Attach the First Row Gabion to the Wall
Assemble the first row of welded gabions and attach them onto the wall with clamp plates & bolts system (steel plates & eye bolts system).

Step 5: Insert Beams into the Gabion (Optional)
For more stability, you can install the first row of welded gabion into the ground/concrete. You can also insert beams through the gabion basket.

Step 6: Fasten Angle Section & Clamp Bar (Optional)
You can install angle sections and clamp bars for additional stability between welded gabions and wall as well gabion neighbors.

Step 7: Fill the Gabion
Fill the welded mesh gabion cladding with stones. Natural stone (such as basalt, granite, slate and gneiss, etc.) with dense structure is the most used material to fill in gabion cladding due to its durability, stability and resistance performance.
Step 8: Attach the Remaining Rows
Repeat steps 3–5 above for each row of welded gabion installation.

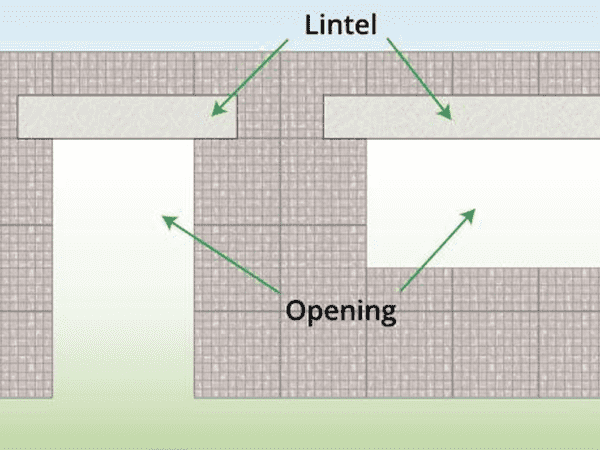
Step 9: Add an Opening (Optional)
If a lintel is required, then a door or window needs to be made in the cladding opening.
Step 10: Complete
All installation is complete as the drawing, the gabions are firmly attached onto the wall and has flat surface for better appearance.

Related Projects
Welded mesh gabion cladding in garden

Welded mesh gabion cladding in plaza